COOP Saga…It’s Finished!

Standard

Long time – no type!

I apologize for my sporadic updating. Things have been very busy with the onset of spring. One day it was snowing and 30 degrees, the next 70. A few more fluctuations and it looks like Spring is here to stay! I have to admit, after the crazy polar vortex winter we had, I am glad for the gorgeous weather.

So let me tell you about our coop saga….

We finished the roof and had everything ready to go when a freak rain storm came through, dumping 5 inches of water in a day. We thought that would be a good test of the roofing system we had in place for the coop. You can say that it was a good test…a full collapse occurred! All our hard work and about $200 of roofing materials torn. We had originally bought corrugated tin roofing but took that back and got corrugated asphalt roofing. Logic told us it would be easier to install. Having the coop integrated into our deck, although a great idea has proved troublesome with the roofing. We had installed spacers, 1″ and 2″ to provide a slope to push what water would filter through the deck boards onto the roof. Well…we didn’t take into account that the asphalt roofing would bow and buckle. *SIGH*

So what did we do? We ghetto-rigged it. It’s a semi-permanent solution. We had ran out of other options, so when my husband mentioned just adding a heavy duty tarp to the top of the deck and then laying down outdoor carpet, I had wrinkled my nose. Snobby I guess, but I didn’t like the idea. But we were out of money and couldn’t afford another $200 roofing system to go on top. So off to Harbor Freight for a $20 tarp (with 20% off coupon) and $0.21/sqft outdoor carpet we found on clearance at Lowes (total $40), we tried it. And a few days later the weather cooperated with another 2″ downpour. It worked! The coop was dry.

Which was a great thing since, for as much as I love my chickens, having them in the house was old. Very very old. The chicken dust has been horrible. I HATE IT. Wipe down everything (including walls), see new film of chicken skin dander 10 minutes later. YUCK.

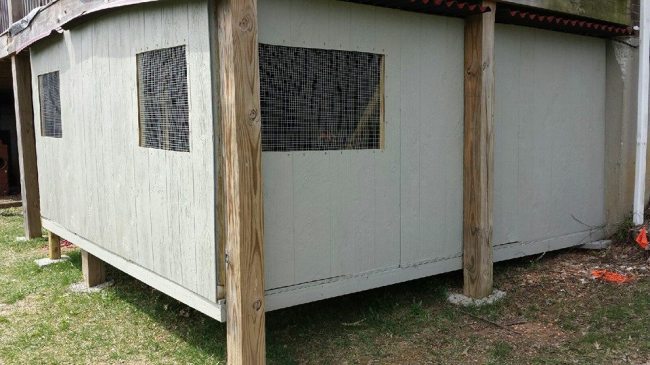
Since only half f the roof collapsed, we left the other side. We can pull it down pretty easily if necessary. See the tarp folded down on the deck? It’s covered on the top by the outdoor carpet but visible from the sides a bit. I am trying not to notice. >.<   Nor the ridiculous amount of cash we paid out.

ImageImage


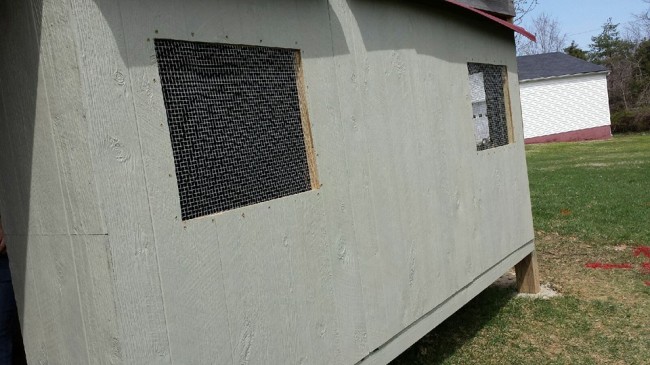
And did you all notice the floppy asphalt roofing that is hanging unevenly? We’re considering ways to fix that too. It was surprisingly fragile considering it was roofing. Granted, we suspended it from the decking joists instead of screwing it into a solid surface. Perhaps it would have done better otherwise?

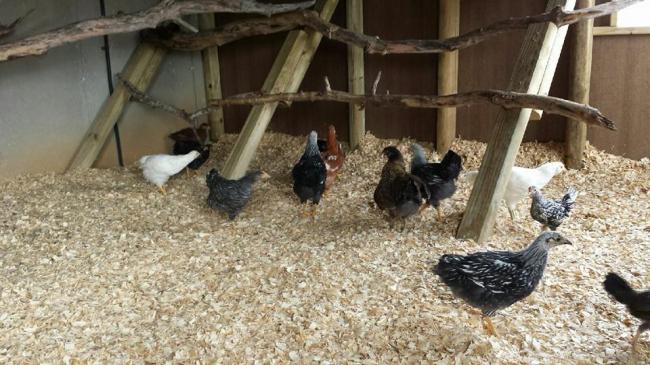
And inside the coop, we took branches that had fallen off of a tree, destined for the fire pit and screwed them into garden timber supports. The chickens love those, and when they get all nasty, we will just replace the branches with new ones for them to explore.

Image

Want to know how quickly chickens grow? Remember those cute little fuzzy butts I had taken pictures of previously? Well, here’s a picture of them checking out their new digs.

Image


My “Sweetie” chicken with a “How YOU doin’?” expression as she eyed the camera for treats.

Image

More to come. More quickly. Promise!


Technogeek Turned Renovator??

Standard

And people thought I would just stay home and not do anything but drink my coffee!  *sipping coffee as she types this up with a smirk*

My house is an older house. It’s almost as old as I am, beating me only by a couple of years. And although my husband and I have poured a lot of money into it to update the flooring with hardwood and ceramic tile, repainting everything, adding french doors, etc, there is one room that we had not updated yet. The front bathroom! It wasn’t for a lack of desire to do so. Let’s call it a little husband stubbornness in getting rid of the solid, yet really ugly, wood bathroom vanity. So one day, when he was at one of his business conferences, I got this gleam in my eye. You know that gleam…where you know you’re either going to do a fine job at changing things up or punishing the furniture beyond repair to where it forces a replacement?  Below is the journey of said renovation. I apologize in advance for the quality of pictures. Not only is this a tiny bathroom and difficult to get a good angle picture, but I had to take the pictures with my cell phone. The other disclaimer is that I am NOT handy by nature. I call it a good day when I can hang a bathroom mirror by myself.

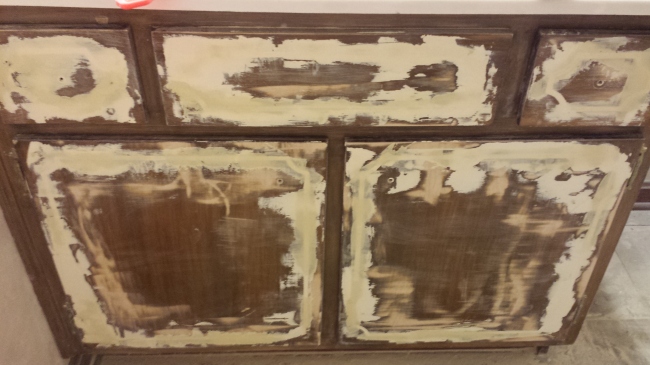
So here’s the victim. Yes, it’s filthy. I hated it so much that I hadn’t bothered with scrubbing it down in a long time.

Image

So queue the wood putty. My first ever attempt at wood putty. It took several coats of the wood putty to fill in those 70’s grooves. The other hilarious part of this story is that the husband’s hand sander died. I couldn’t get it to work. He had a much larger belt sander. After attempts to hand sand the putty did not work, I had to bring out the big sander. I suppose I should state that my entire hallway and living room saw minuscule pieces of wood putty for days and days and days and days! (I’m sure you get that picture!) I am still wiping down my walls as it settles!

Image.

I looked like a redneck Marie Antoinette after that sanding job. I was literally covered in white dust. Thank goodness I had at least had the forethought to wear a mask!

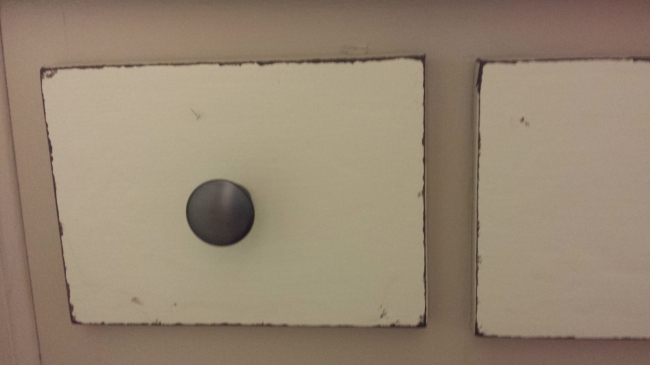
As my most amazing sanding job ever left grooves in the wood panels, and the paint job did not fully cover all of the imperfections of the cabinets, I decided to faux distress the paint job. I was afraid that if I took real sandpaper to my paint job, that I wouldn’t like what I did and have to redo everything! So below is my faux distressing work, using a dark acrylic craft paint. It gave me the freedom to wipe off the marks if I didn’t like it. It was easy, fun and turned out uber cute! I am still debating adding additional “distressing” before I finalize it with a coat of poly.

Image


20140319_104904

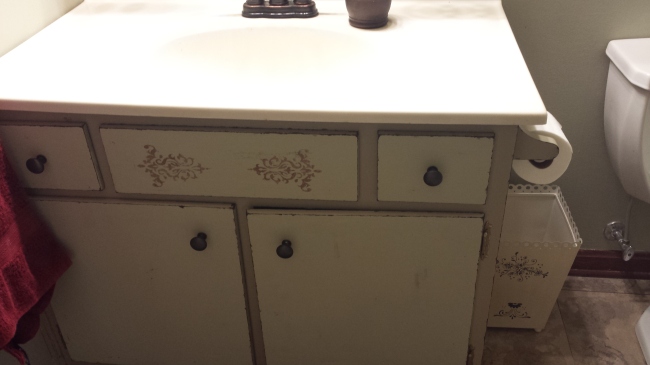
The front was still a little plain. So a trip to the local Home Depot produced a stencil. I added that to the front cabinet.

The beauty about distressing things, is that it does not have to be perfect! I do, however, need to readjust the hinge so that the vanity door shuts all the way. 🙂  I was honestly shocked I was able to get the doors off and back on successfully!

And notice the little score I found at the local Peddler’s Mall? The cute little retro trashcan! I have not done anything to it yet, but seriously considering painting it a dark color, then light on top and distressing it for real! And then adding another stencil to the front of it that came in the same package. Not too matchy-matchy but just enough.

Image

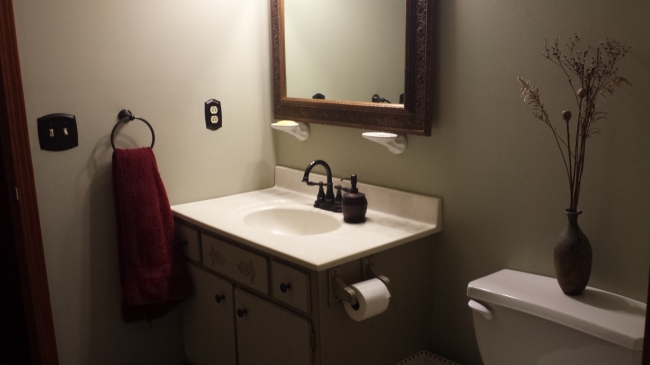
The original plain 70’s glass mirror was cut down and placed into this frame that I had laying in the basement. The frame was originally a bright gold. I took a bronze paint to it to tone it down. I also gathered weeds from my backyard and put them into that vase. Ha! A temporary solution until I find something that hits me.

Now…I will not claim that I am a good decorator. I would love to be, but I really struggle with this! Below is my somewhat final result. While it is TONS better than it was before, I do see room for improvement. For example, I need to raise the mirror another inch or two.

Image

Now, my readers….your thoughts? What else should I do to make this bathroom better? Should I distress that cute little trashcan? I am trying to keep the vanity pretty clear and simple. That said, should I add anything else? What about some other wall art?  Super cheap options are the best!

Coop Plans

Standard

Today is my first day of unemployment land! All of the area schools are closed again due to that Polar Vortex we keep experiencing, so it will not be representative of my normal week days. Right now my son (10yr old) makes a mess faster than I can keep it clean. My goals are to get and keep the house clean and organized!

One of the things that I have to plan quickly is the chicken coop!  I have 20 baby chicks in my kitchen. Some are still at the fuzzy ball cute stage, and others are starting to look a lot like pullets with real chicken feathers, at 2 weeks old. This means I have 3-4 weeks to build a coop!  Scary that I have that little time, so the plan design is very simple. I’ll make it look cute once it’s up and functional.

Below is the initial plan. According to the 4sqft per chicken, it looks like I might have to make the coop itself a bit larger. This is going to be a huge building!! A lot more cost than I had originally estimated. (Imagine that!) Good thing my loving hubby seems to be pretty flexible about this.

We found a killer bargain at the local Lowes on chicken wire. 50 foot rolls, 48″ tall for $6 each. So we bought 2 – 50′ rolls, and 2 24″x50′ rolls. And 1 roll of hardware cloth for less than $40! I am kicking myself that we didn’t buy more of them though. They had other kinds that I could should have bought.

Image

When posting the coop idea on a Chicken Facebook page, one of the ladies had an open air coop design like this. Her entire back yard was privacy fenced in though. I would love such an open air plan but I believe that my chickens would get eaten by a raccoon if I did so. I would also worry about the crazy Indiana weather!

Image

What are your coop designs like? Any feedback on my coop for functionality that I should change while I still can?

The Chicks!

Standard

It’s about time that I posted again. Since I put my notice in at work, things have been hectic. That and there have been two new baby boys in my immediate family and a round of stomach flu in about everyone! So needless to say, blogging has not been in the forefront of my mind.

I gave a 30 day notice in to work. It’s bittersweet. I am thrilled to not have to work anymore but I will miss everyone and my job. For all the stresses it created – and sometimes I came home with little more worth than a lump of blubbering mess due to the stress – I loved my job. It’s just time for me to move on to different things. And what I am about to do is vastly different than before. I was a technogeek at a local college. And pretty darn good at my job. However, as of Friday, I am turning a complete 180 degrees. I am going to be a full-time house mom, mini-farmer, and creator of organic crafts! Oh, and work about 10-15 hrs a week for my brother to help finance my new endeavors.

As part of this, we went down to the local Rural King. To be honest, I didn’t know that this place existed. Or that I would enjoy it as much as I have. Think of it as a mini-Walmart in farming stuff. And guess what they have?! Baby chicks!

We picked up 8 this time and will be picking up another 12 tonight. I am finally ready to get out of the house (stomach bug hit me Tuesday/Wednesday) and so will head there this evening. So to see some of the babies I have so far? They are the cutest! On Monday, we did attend a Chicken Orientation and it has changed my ideas on breeds a bit. I was looking to get a lot of dual-purpose chickens in the effort to become closer to my food source. These girls will be my egg layers and after 2-3 years when they stop laying, chicken stew. What I will do with the next season (this is the changed idea part) is I will raise broilers. Cornish Cross chickens who are ready for harvesting at 6 weeks of age! Crazy to think of that, but if I did it right, I could raise these chickens and get my home-grown chicken meat for the freezer. I would know exactly where my food came from, without sacrificing these other chickens that will no doubt become my pets.

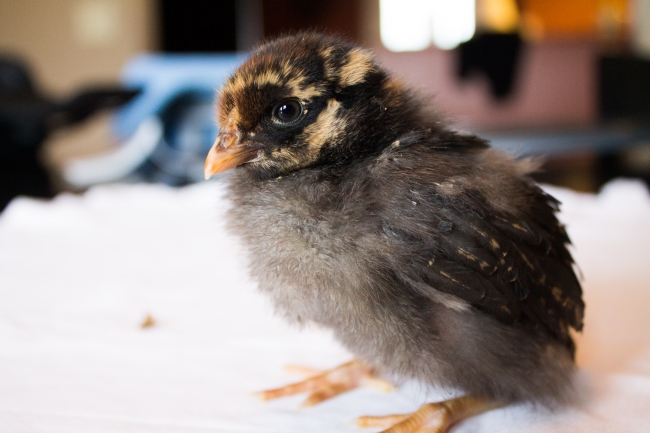
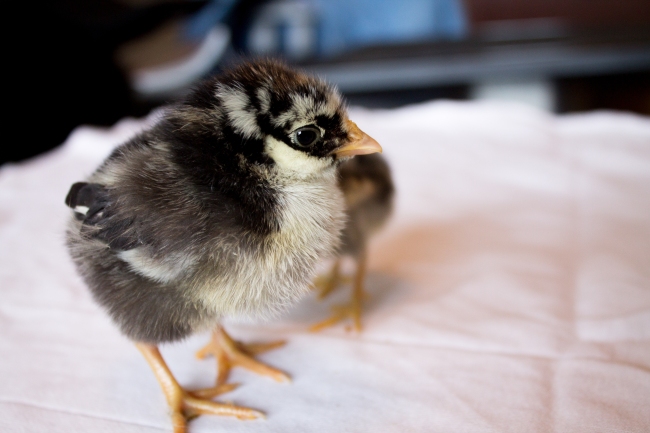
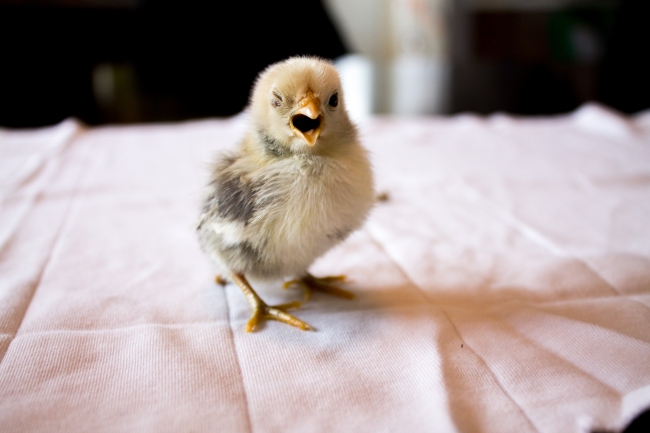
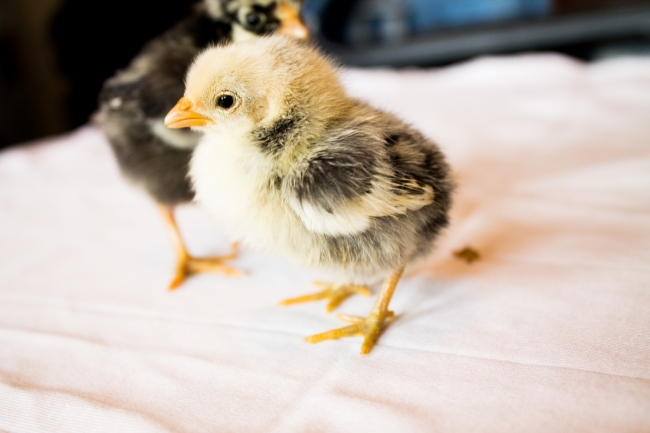
So let me introduce you to my peeps:

At this time I have 2 Golden Lace Wyandottes, 2 Bantans (think mini-chickens, my kiddo fell in love!), 2 Light Brahmas, 1 Jersey Giant, 1 Black Australop. This next round to Rural King, I’ll be buying Rhode Island Reds and Isa Browns for their egg laying skills.

What about you? Do you have chickens? What are your favorite breeds? If you raise meat birds, how do you cope with the harvesting process?

Image ImageImageImageImageImage

Isn’t eating gluten-free REALLY hard?

Standard

“What else is there to eat??” You would be shocked how often I get this question. People have become so accustomed to their main portion as bread or pasta that they truly can’t work out in their head of how to eat without this.

Now, because I am not Celiac, I do not worry about some hidden gluten items, like in soy sauce. As I use up my old supplies, I do replace those items with organic or  homemade versions. How I am able to work things out with my family may not be for everyone. Below is a list of regular, every day foods that we eat as a family. At times, I do take advantage of the special recipes that I see on websites like MyWholeFoodLife.com and WholeFoodSimply.com – which happen to be some of my favorite sites. But working full-time leaves little time to create new recipes during the week when I do well to be home by 6pm!

Also, if you focus on the gluten-free grocery-bought breads and pastas, you can easily spend a small fortune. I see them as a placebo when my cravings are insane; a treat, not a regular occurrence.

Below is a list of common grain-free easy meals that I make. I have intentionally made this list very generic. It’s to show you how easy it is to make simple meals, and to be able to substitute a variety of items into it according to your tastes, budget and availability. Note: Yes, I do try to buy organic items, especially the dirty dozen list in fruit and veggies. I also try to buy local, farmers market, and have connections to local farmers for things like my eggs and meats. I have also been known to forage!

  • Baked chicken (or pork) and roasted veggies (cauliflower/broccoli/Brussels sprouts/peas/potatoes, etc)
  • Baked fish and roasted veggies and brown rice/quinoa
  • Fried rice with leftover veggies and meats or shrimp
  • Italian sausage over roasted potatoes and onions with shredded cheese
  • Bacon, eggs and homemade hash browns
  • Omelets
  • Red Chili
  • White chicken chili
  • Potato soup, regular and cheesy with broccoli
  • Cheesy broccoli soup
  • Butternut squash and pumpkin soup
  • Wild rice, chicken and mushroom soup
  • Beef stew
  • Beef roast with potatoes, carrots, onions
  • Baked GF spaghetti (GF pasta, spaghetti sauce, olives, artichokes, chicken, onions, cheese)
  • Slow cooker BBQ and stews
  • Tacos and enchiladas made with homemade organic corn shells. Or make with Romaine lettuce boats.
  • Salad with sauteed shrimp or rotisserie chicken
  • Baked potato night with various toppings (including leftovers, chili or Sloppy Joe type-mix)
  • Meatloaf with cheese and spinach instead of breadcrumbs. Pair with veggies/salad.

The baked chicken/fish can be made topped with cheese, or different spices, or Franks hot sauce, BBQ or teriyaki, or a million other flavors. They can be breaded with Parmesan cheese for chicken fingers with homemade fries. This is limited only by your imagination and budget.

Oils: I only use Olive Oil when over salad.

Organic Cooking oils: Grass-fed butter. Good ole’ fashion butter! YUM and great for you! Coconut oil is a close second! Followed by grapeseed oil. These are heat stable and do not break down like olive oil when cooking.

I do enjoy cooking, and yes, sometimes I do get into a mood where the entire meal is very gourmet and takes almost all of the dishes in my cabinets to make. However, when it comes to fast meals, the above are my go-to meals that are easily converted to gluten-free without additional expense. These are also the type of meals that I can make large batches of and have leftovers for work lunches. This alone has saved hundreds out of our monthly budget.

Once you get into the habit of not reaching for the pasta/bread as your side of every course, it gets MUCH easier.

I hope this helps to answer questions on gluten-free foods. This is a good list to refer to if you are preparing foods for people who are eating a gluten-free diet. Now, that said, if the audience is Celiac, where all “hidden” gluten can be life threatening, more attention will need to be paid to the ingredients list. Items must be labeled “gluten-free” tested to less than 20ppm (parts-per-million) in order not to flare their disease.

What other quick, easy, home-style meals have you made that we should add to this list? As always, I would love to hear!

Oh the winter skin!

Standard

Image

Now that I’ve hit the big 4-0, I have noticed that my skin just isn’t as smooth as it used to be. When I’d see a little crusty skin in my past life (i.e. pre-crunchy), I would smear a little Vaseline on my dry skin. Now that I’m a bit crunchified I refuse using that product at all! So what’s a flakey-skin girl to do?

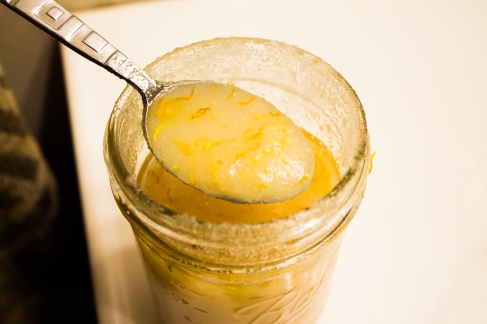
Make up a quick batch of the most luscious lemon calendula flower sugar scrub, of course!

Seriously folks, this one is easier than making a pot of coffee.

RECIPE:

  • 1 part organic oil (I used sweet almond oil but even olive oil works well)
  • 2 parts plain white sugar (It doesn’t have to be organic – you aren’t eating it.)
  • 20 drops of lemon essential oil
  • 2 heaping tablespoons dried calendula flowers

And ready for the hard part? Pick your jar out. Yes, you heard it right. For me, the most difficult part was picking out which Ball jar would work best for the job. The rest is just dumping the ingredients in the jar and mixing it together. Your scrub will become a lovely yellow as the flowers dispense their coloring to the rest of the scrub.

Why did I pick the lemon essential oil? Well, I love the smell of lemon. It reminds me of the sugar crystal lemon drop candy we ate as children. Okay, and perhaps more than a few times as an adult *COUGH* Does this scrub smell like that candy? OH YES. Now Kim is a happy camper when scrubbing her face! Lemon essential oil also is known for it’s anti-fungal, anti-bacterial, anti-viral, anti-inflammatory, and astringent qualities.

The calendula flowers are a wonderful addition for your skin (see this blog for a list of those benefits) I bought mine at Mountain Rose Herbs, although I may grow the flowers in my new garden next year for my own supply.

While I do not recommend it, if you “accidentally” happen to lick a bit of the scrub off of your lips as you are exfoliating them as part of your flake-removal process,  it does taste pretty good.

*NOTE* Remove a spoonful of the scrub and put it into your hand. Reaching inside the jar has the ability to contaminate the rest of your product, making it go rancid more quickly. Do not add water to it. If the oil and sugar separate, simply stir. If it begins to look a bit more crumbly than you prefer, add a few more tablespoons of the oil.

Mix up a batch and let me know how you like it! Please feel free to suggest additions for the next batch in the comments section below.

Who knew Rosacea would be affected?!?

Standard

Hello, my name is Kim. And underneath the multiple layers of foundation, I have Rosacea.

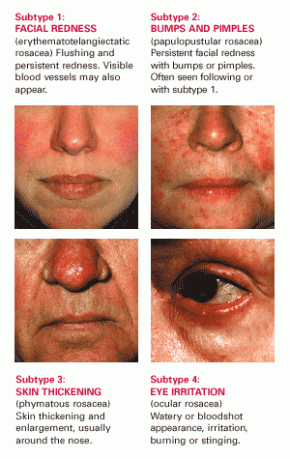
Image (Photo from http://www.rosacea.org)

You see, I’ve been fighting Rosacea since I turned 32. Rosacea is a horrible skin affliction. I can call it that because that’s what I deal with. I truly hate this physical manifestation on my face. I feel deep sympathy for those who have more progressed cases than mine. Although there are many more skin afflictions out there that are considered much worse, this is my own personal enemy, much more than my cellulite or veins or anything else. I became so self-conscious that I feel like people are staring at it, instead of looking at me for me. Do any of you know what I mean?

It’s a red flush with lots of deep, painful, cyst-like pimples (see above picture). And let’s not forget the ocular Rosacea. I have that too. That would cause a dozen styes across my lash line that were so painful. Most people don’t realize I have Rosacea. I have hid it well. I’m fairly decent at applying make-up, so what they thought was a smooth complexion (and a bit heavy on makeup) was really about 6 layers of foundation. Yes, 6 layers.

What the doctors’ recommended. Daily antibiotics (oral and topical) for the rest of my life. I do well to take any medications period – no less an antibiotic daily! Even at my most uneducated state, I knew that daily antibiotics were not something I was willing to do. So I opted for other treatments.  I would annually have a laser treatment to zap those broken capillaries (side-effect of Rosacea). I would come home with blistered cheeks and black eyes. But it was effective at reducing the redness. I would also get photo-facials, which is known to help kill the viral infection which spreads the Rosacea.

I would have included a picture of my face in this blog, but you know what? Not only am I good at applying makeup, I am apparently stunningly great at deleting horrible pictures of myself! Lol! So how does this post relate to my Road to Crunchy? Now this is the interesting part…As I began to eat less processed foods and use different facial soaps and lotions, my Rosacea began to fade! It took me about 4 months to realize that it was fading, but as it did, I began to cover it over less and less.

Image

Now…this is a picture of my cheek as of this morning (Don’t mind the cat eye liner, I went glamorous at work today). With one very light layer of foundation. Yes, you can see the redness a tiny bit. I don’t mind that much redness, and so I have reduced the amount of foundation I use by 75+%. The great news is that I no longer have any flare ups with ocular Rosacea at all. And unless it’s TOM or I’ve changed up my facial care routine, I no longer get the breakouts on my chin. Or eat something I shouldn’t. Then I’m smacked with a pimple the size of Texas.

What am I using? I switched from my regular face soap. I can’t tell you exactly what that was, because I tried hundreds, including Proactive and other equally (or more) expensive products. Yes, I’m a bit vain in the fact that I didn’t want pimples!  😀

Now I use MSM Herbal Moisturizing Bar Soap $6. It’s cheap and lasts a long time. What you’ll learn if you follow my blog (please do!) is that I’m a research fiend. Reading that organic sulfur was great for skin, I was like “sure, why not?!” And bought this soap, based purely on the reviews on Amazon. Best. Purchase. Ever. Seriously!

For my face, I use my homemade face lotion/salve. It was my first experiment at making my own lotion. That recipe will be on another post as I perfect it. Right now, the end product is a little thicker than most people would like, so I have to play with the recipe a bit. I warm it up in my hands first and then slather it on.

Another thing that I now do is use mineral only eye makeups. I discovered a great company on Etsy.com and they are called Madison Street Beauty. Pure minerals for a much cheaper price than the other mineral makeup.

Anyway, enough about my beauty routine. Do you fight Rosacea or another skin condition? Has natural/organic treatments worked for you? Post your experiences below, I’d love to hear about them!

The beginning… (Lengthy!)

Standard

Let’s call this a retro-active beginning. A beginning that occurred back in March of 2013. Here I was, living “the American Dream” with a good job, a family and money in my pocket. And a lot of health issues! My meals consisted of fast food and boxed meals. I knew how to cook, yes. But frankly, I found myself too busy to cook more than opening a bag and heating it up.

Overweight. Over-stressed. Over-sick! In March, it was the height of my asthma issue. Counting the minutes between puffs and maxing out on them daily. Three plus asthma attacks a day. And I have GURD. This means I was also eating a very large Sam’s Club sized bottle of Tums every month. So what happened in March 2013 that has led me here? Well, on top of the asthma issue, I dealt with my esophagus closing. I could eat food but it got to the point that I could no longer swallow food that was any larger than the circumference of a dime! Upper GI, ballooning of the esophagus and scraping out the scar tissue to hopefully prevent the possibility of esophageal cancer. YIKES! Talk about a wake up call!

And so then my lovely sister-in-law pulled me aside and mentioned her eating habits and how they had made such a drastic health difference in my brother. It was like a lightning bolt to the head, followed by the choir from heaven lowering and making a thunderous “LAAAAAAA”. Oh yes, this was my moment.

GLUTEN-FREE ME:

My husband and I sat down and had a long talk. We decided to try this new life-style in an all or nothing start. This means that we went gluten-free, processed food-free, refined sugar-free. Why this particular diet? Aside from the possible gluten-intolerance, it is considered an anti-inflammatory diet. And with my GURD and asthma and depression, anti-inflammatory was key to being healthier. Within 30 days, we felt drastically different and better. Oh so much better. Was it easy? NO. There were days I could have killed for a piece of bread. K-I-L-L-E-D. It took about 3 weeks for us to get over most of the cravings. And even now, we crave bread. Especially IHOP pancakes. But as a family, we went from 13 medications to only 5 within 3 months. And of those 5, most of those are at half the dose. Without getting into more personal details, let’s just say that the differences were profound.

Face picture  22lbs

Here’s one of my progress pictures. This is from March to September 2013. 7 months. Now the actual pounds has not been that drastic. My body has been pretty stubborn about letting go of it’s fat. It’s owner has been pretty stubborn about not starving herself either! I eat approximately 1400-1600 calories per day. But as you can see, I am no longer drowning in my own chin fat. And notice the temples? Those are the same glasses! Apparently my temples needed to lose weight too. My weight loss is very slow, but it is second in nature to overall gaining a healthy lifestyle.

What I noticed during this transition, is that the more organic I went, the better I felt! I’ll detail in other posts what exactly I have done, and what my plans are for my future crunchification! (Yes, I enjoy making up new words.) The purpose of this blog is for you, my readers, to understand where I came from, and where I am going as I trek into the land of Crunchy! (The best definition I have come across is the one here: http://www.crunchybetty.com/so-i-ask-the-tribe-what-does-crunchy-mean), a life style of learning how to be healthy and natural.